How to get rid of slow-selling inventory on amazon easily with a flat file Bulk Removal Order Template
When you’re selling on Amazon FBA, sometimes you scan inventory to resell, but it turns out to be slow-moving inventory. After a while, these slow selling items start to add up and clutter your inventory. Theses items end up just sitting there, costing you money. To make matters worse, Amazon will also start to charge you long term storage fees if they sit on the shelf too long
Every once in a while, you need to clear that slow moving, low demand inventory. This will help lower your costs and make more overall profit.
One way that I remove slow selling inventory, is I will use my repricer, excel and Amazon’s Removal Order File Template. The way I do that is by setting certain rules on my replacer, so it extracts all my slow selling (high sales rank) inventory. This way I can do this in bulk, very quickly and easily by simply using a repricing software and excel.

Steps to do the bulk order removal of slow selling inventory (high sales rank):
- Set your repriced to not reprice items above 2 million
- Reprice items
- View repricing reports
- Download repricing report
- Sort by sales rank in excel
- Fill out and paste all SKUs into the Removal Order File Template
- Upload bulk inventory loader to remove your items
The following is a step by step on is how I use this Amazon reprice software to get rid of old inventory.
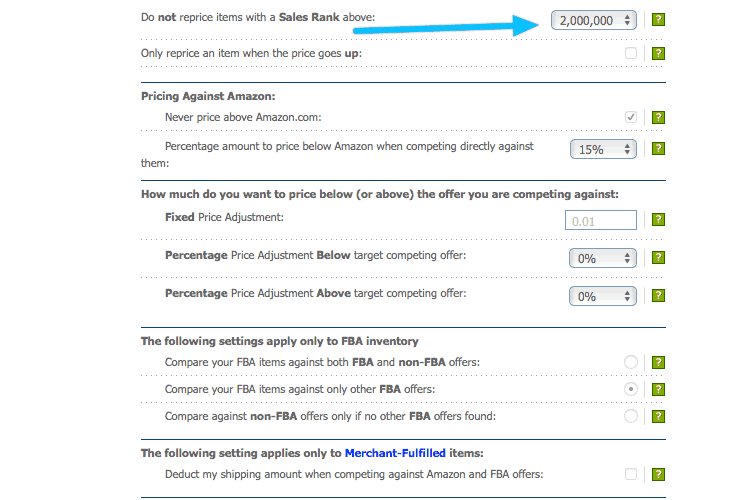
1. Set reprice to ignore sales rank above 2 million
There are several different repricing software on the market for Amazon sellers. Repriceit is the one I currently use. I’ll be showing you how to remove old inventory from Amazon FBA with repriceit, however you don’t need repriceit to do bulk removal orders. You just need a list of SKUs and a spreadsheet program like excel.
For this example, I set the rules for my repricer to not reprice items with the sales rank above 2 million (or 1 million). For this example, I set it to 2 million sales rank.
2. Reprice items
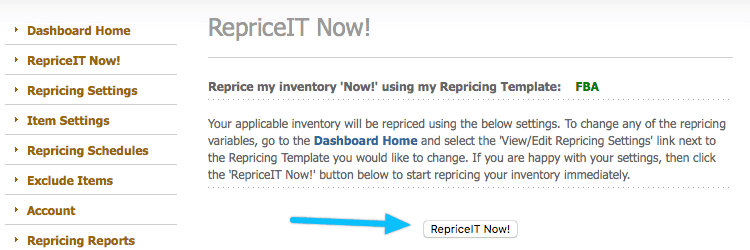
Go ahead and reprice your items with your amazon repricer.
3. View repricing reports
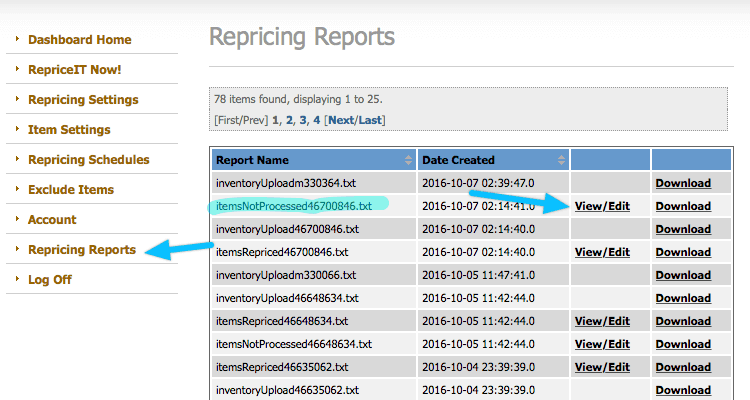
After you reprice it, head over to repricing reports. As stated above, I have it set to not reprice my inventory that has over 2 million sales rank.
For this example, most of the items are books, so anything over 2 million would be pretty slow selling for selling books with Amazon FBA.
Next to items not processed, click view.
Now we can sort by the sales rank – where it’s showing the highest sales rank at the top. As you know, the higher the sales rank is, the slower it will typically sell.
As I scroll down in my example, I have several items that are pretty old and slow selling (low sales rank).
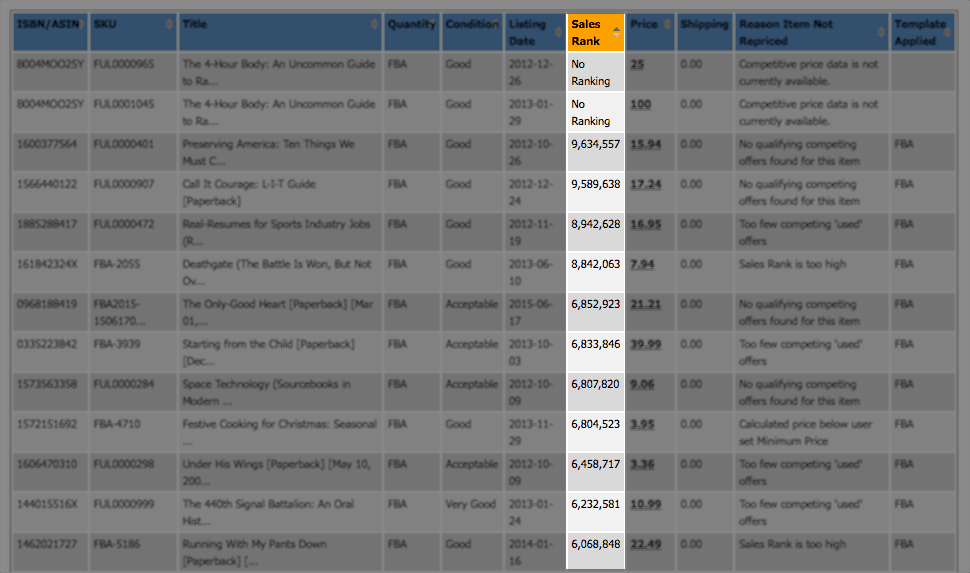
I need to create a removal order for these. The problem is, its a pain to go into the Amazon seller central interface and remove each one individually by SKU number.
It is much easier to download this whole report and copy the SKUs over to Amazon’s bulk removal template so we can do a bulk inventory removal order through Amazon.
4. Download repricing report
If we go back over to repricing reports in repriceit, you’ll see the “itemsnotprocessed” report with a download link next to it.

Note: I’ve noticed an issue where I download it and it saves the file with an HTML extension.
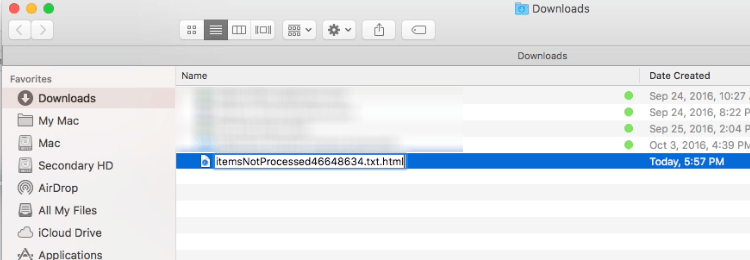
To fix this, all you need to do is rename it with a .txt extension, then open it with Excel.
5. Sort by sales rank in excel
From here, we can select all these top values and click filter. Then we can sort the sales rank, with the highest sales rank on top.
Optional: You can format the sales rank row to show a comma on the large numbers, so it’s easier to read the number.

Now we can easily see all the old inventory listed at the top. Also note that if it has no sales rank then that means it is not selling either, so we want to get rid of those as well.
6. Fill out and paste all SKUs into the Removal Order File Template
Download the Removal Order File Template from Amazon. Basically all you need to do is download the template and open it up in Excel. The file can also be found on the main Upload Removal Order File page.
This is their template:
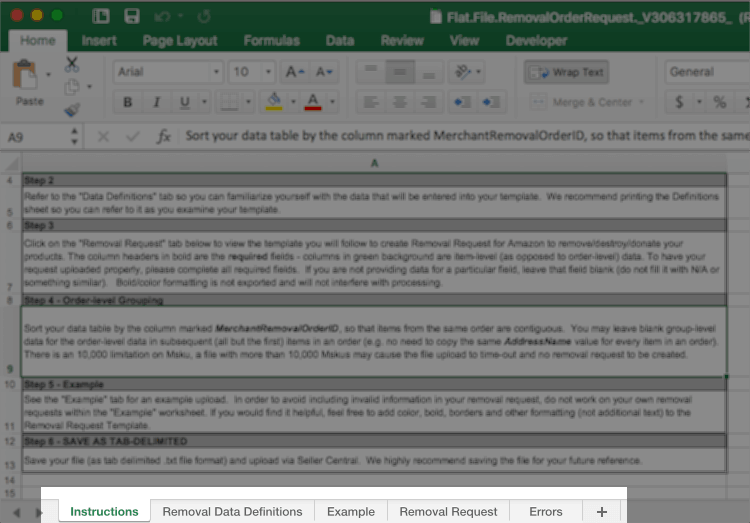
Description of each tab:
- Instructions: It kind of goes over the instructions on how to upload the bulk removal order
- Removal Data Definitions: This goes over the definitions of the items that you can use on the template.
- Example: This is an example of what you would fill out:
- Removal Request: This is the actual order removal section that you will fill out.
- Errors: This section shows typical errors that you might receive when you upload your Removal Order File.
- How does it work exactly?: Basically the way it works is we will just export the Removal Request excel section (after filling it out) as a tab delimited text file, then upload it to Amazon.
Filling out the removal order file template
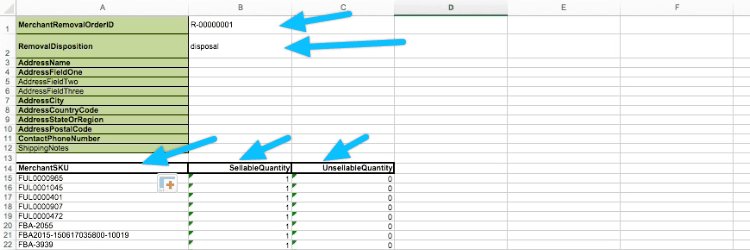
- Merchant removal order ID: Under merchant removal order ID, enter in anything that you want to keep track of those. As long as it is under 10 characters, it should work.
- Removal data definitions: Under removal data definitions, you can see that you can enter return, disposal, donate, or liquidated. However, currently for the bulk upload, you can only do disposal or return.
- Return: is when they just send back your address. It is a higher fee than the disposal option.
- Disposal: Disposal is where they throw away your items, and has a minimal fee.
For me I want to have Amazon dispose of my items so it will cost me less. Since they are slow selling items, I don’t want Amazon to send them back anyways.
If you’re selling wholesale items for instance rather than doing retail arbitrage, you may want them to send the items back. It just depends on what you’re selling on Amazon and if its worth it to pay the extra fees to send your item back.
If it’s not worth it to you to have Amazon sent it back to you, you can just have and dispose of it.
When doing disposal, I don’t need to input any of the address or shipping information, for obvious reasons.
For the merchant SKU, we can go back to the repricing report excel sheet and copy all the SKUs that are higher than 1-2 million sales rank. Again, the reason I do 1-2 million, is I don’t want these sitting in Amazon’s warehouse racking up fees because they are slow selling.
Then come over here and paste them I have in.
For sellable quantity, for me that’s 1 of each sellable and 0 of each unsellable.
7. Upload bulk inventory loader to remove your items
Next export this as a text file.
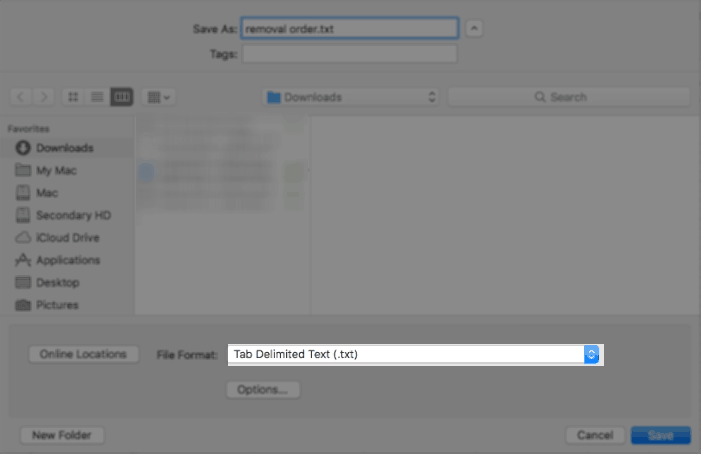
To do this, just go to save as in excel and choose tab delimited text (.txt).
You can name it anything you want.
After saving it, go to Amazon’s Upload Removal Order File page and choose the file you just saved. Then click upload now.
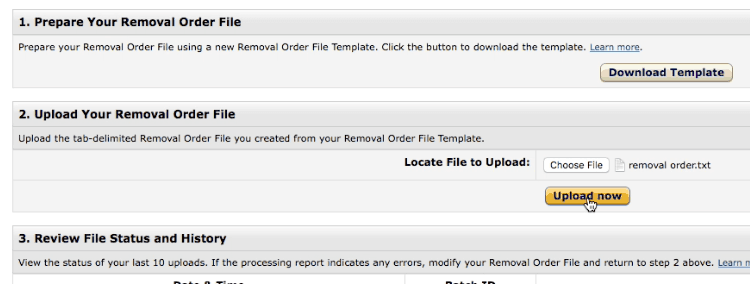
It may take a little bit of time for it to show up that the items successfully uploaded (or have errors).
After a few minutes, and after clicking refresh, you can take a look to make sure that it didn’t have any errors.
After clicking refresh it now shows that I have 86 records that were successfully activated. This just means that it created a bulk removal of 86 items.
That’s it! That’s how you create a bulk order removal on Amazon.
